Prerequisites
- A Cloudflare account with access to the target account (and D1 enabled).
- The D1 database already created in your Cloudflare dashboard.
Step 1: Create a Cloudflare API token
- Sign in to the Cloudflare dashboard and go to My Profile → API Tokens → Create Token.
- Choose Create Custom Token (or a D1 template if available) and give it a descriptive name such as SyneHQ D1 Access.
Permissions for read-only access
- Add permission: Account → Cloudflare D1 Databases → Read.
- (Optional) Scope the token to a single account by selecting the specific Account under Account Resources.
Permissions for read/write access
- Add permission: Account → Cloudflare D1 Databases → Edit.
- (Optional) Again, scope it to a single Account for least‑privilege access.
- Set an Account under Resources to limit where this token applies.
- Click Continue to summary → Create Token, then copy the generated token value and keep it somewhere secure; you will paste it into the Cloudflare API Token field in SyneHQ.
Step 2: Find your Account ID and Database ID
Locate Cloudflare Account ID
- In the Cloudflare dashboard, open Overview for any site in the target account.
- In the right sidebar, copy the Account ID; this is the value SyneHQ expects in the Cloudflare Account ID field.
Locate D1 Database ID
- Navigate to Workers & Pages → D1 (or the D1 section under Data in Cloudflare).
- Open your D1 database and copy its Database ID (sometimes labeled as UUID for the database); paste this later into the Database ID field in SyneHQ.
Step 3: Add the connection in SyneHQ
In the SyneHQ UI, open the Cloudflare D1 connection form.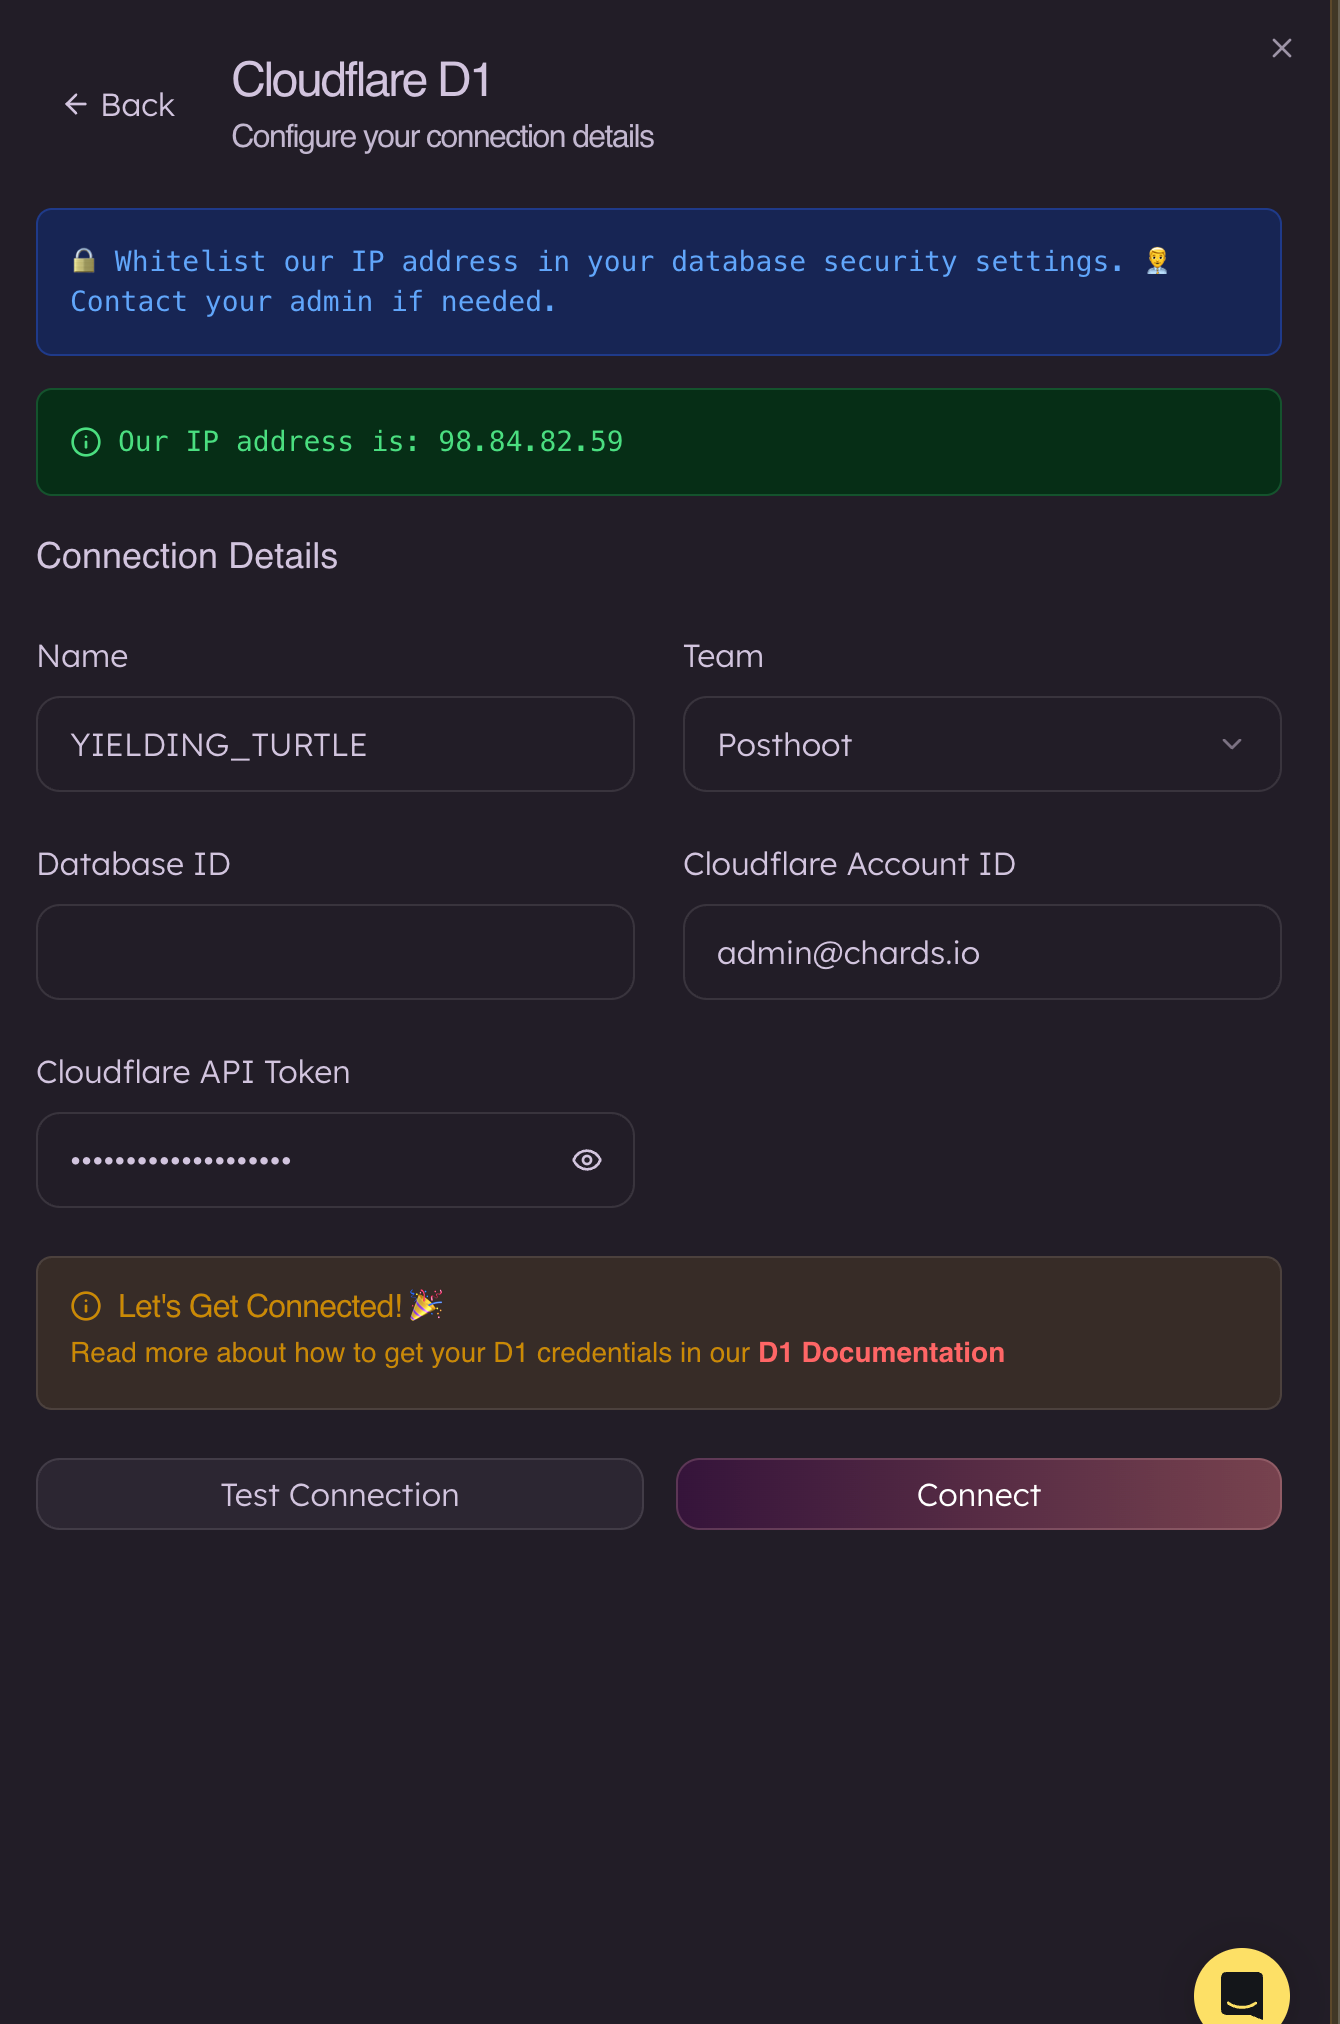
- Name: Any label you like for this connection (for example,
YIELDING_TURTLE). - Database ID: Paste the D1 Database ID copied from Cloudflare.
- Cloudflare Account ID: Paste the Account ID from the Cloudflare overview page.
- Cloudflare API Token: Paste the token you created in Step 1 (with Read or Edit permissions for D1).