> ## Documentation Index
> Fetch the complete documentation index at: https://docs.synehq.com/llms.txt
> Use this file to discover all available pages before exploring further.
# Connect Cloudflare R2
> How to generate credentials and configure Cloudflare R2 as S3-compatible storage destinations in Syne.
You can connect **Cloudflare R2** as S3-compatible storage in Syne by creating buckets, generating access credentials, and filling out the storage form.
***
Cloudflare R2 is fully S3-compatible, so you connect it by creating an R2 bucket, generating an R2 API token (Access Key / Secret), and using the R2 S3 endpoint.
### Step 1 – Create an R2 bucket
1. In the Cloudflare dashboard, go to **R2 → Object Storage**.
2. Click **Create bucket**, choose a **bucket name** (for example `syne-r2-data`), and finish the wizard.
3. Keep the bucket private by default; do not enable public access unless you explicitly need it.
### Step 2 – Generate S3 API credentials (Access Key / Secret)
R2 uses **API tokens** that map to S3-compatible **Access Key ID** and **Secret Access Key** values.
* In the Cloudflare dashboard, go to **R2 → Object Storage → Manage R2 API Tokens**.
* Click **Create API Token** and choose a template that grants access only to the buckets Syne should use (least privilege).
* After creation, Cloudflare will show you:
* **Access Key ID**
* **Secret Access Key**\
These are displayed once; copy and store them securely.
Use these as your **Access Key** and **Secret Key** in Syne.
* In **R2 → Object Storage**, copy your **Account ID** from the overview.
* Open your bucket → **Settings → S3 API**.
* Copy the endpoint URL. It typically looks like:\
`https://.r2.cloudflarestorage.com`\
This is the value for the **Endpoint** field in Syne.
* When a region is required, you can use `auto` or `APAC`, which R2 aliases to its automatic region for S3 compatibility.
### Step 3 – Fill out the Syne storage form (R2)
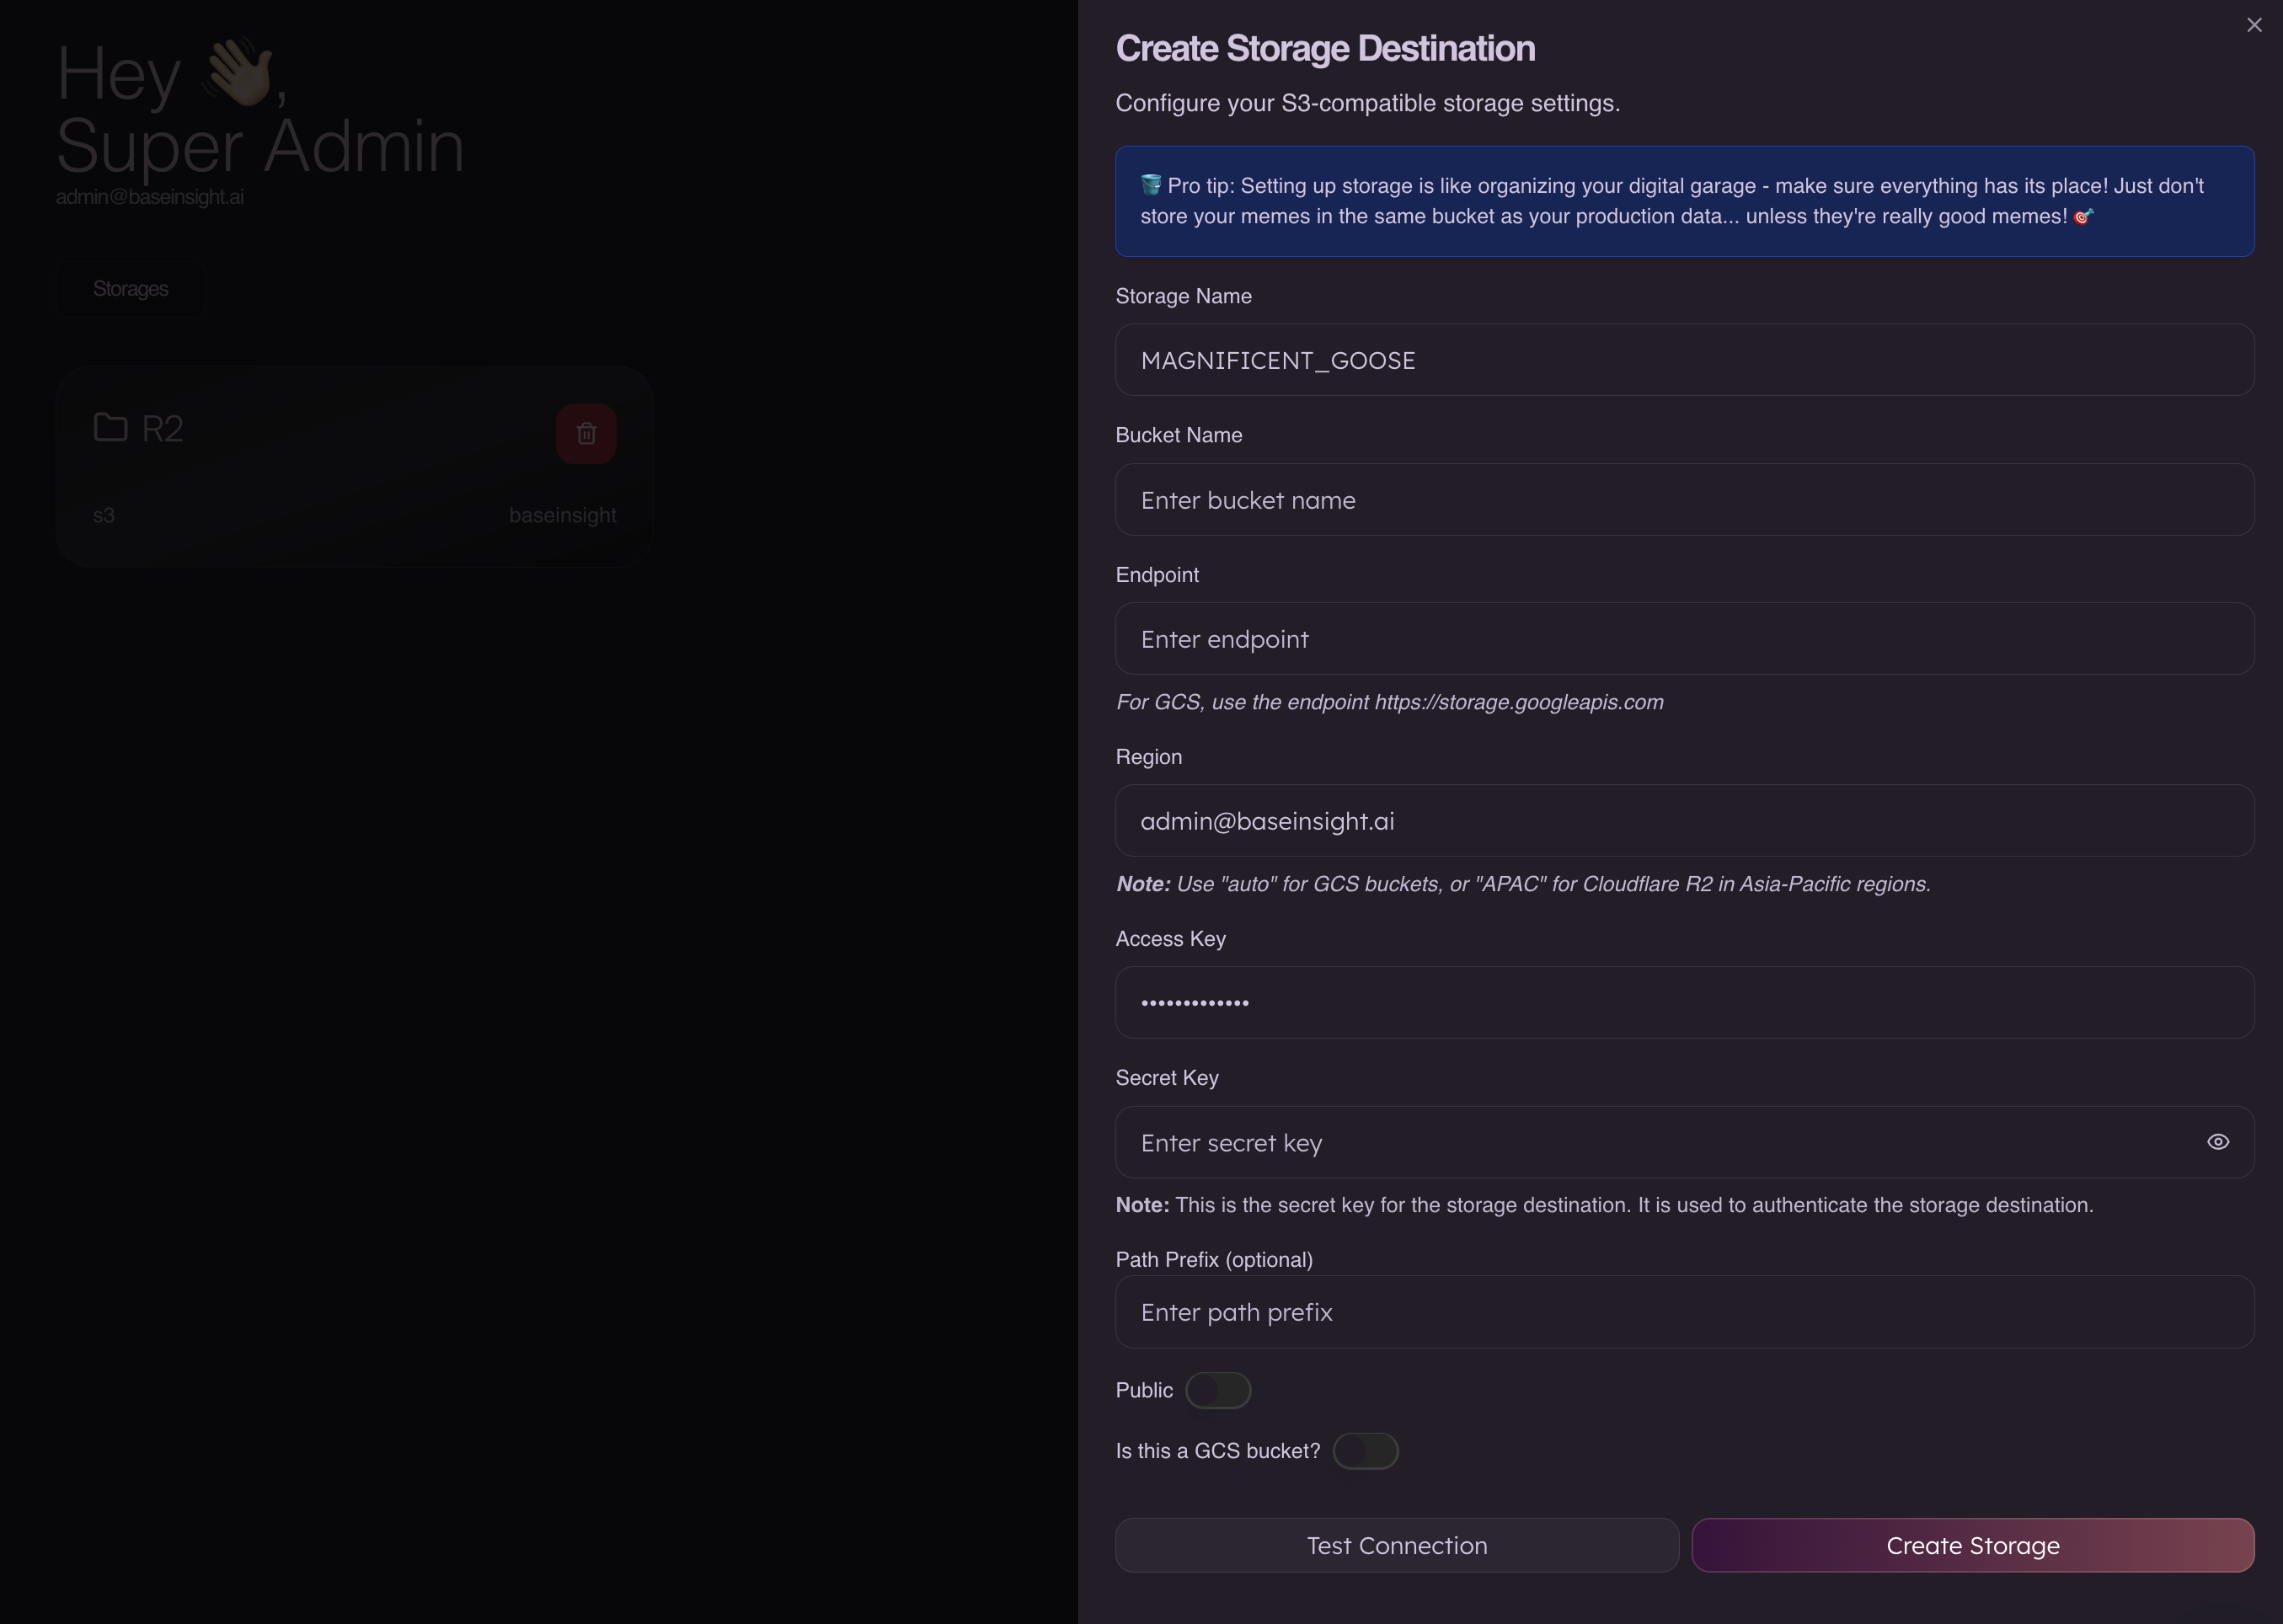 Use the **S3-compatible** option in Syne and set:
* **Storage Name**
* Any label, for example `R2_BACKUPS`.
* **Bucket Name**
* Your R2 bucket name, e.g. `syne-r2-data`.
* **Endpoint**
* The R2 S3 endpoint: `https://.r2.cloudflarestorage.com`.
* **Region**
* Use `auto` or `APAC` (recommended for R2).
* **Access Key**
* The **Access Key ID** from your R2 API token.
* **Secret Key**
* The **Secret Access Key** from the same token.
* **Path Prefix (optional)**
* Optional folder-like prefix, e.g. `syne/`.
* **Public**
* Keep **off** so objects remain private; manage access through Cloudflare permissions instead.
That's it now, you should be able to dump backup files, uploaded files over to your own buckets.
Use the **S3-compatible** option in Syne and set:
* **Storage Name**
* Any label, for example `R2_BACKUPS`.
* **Bucket Name**
* Your R2 bucket name, e.g. `syne-r2-data`.
* **Endpoint**
* The R2 S3 endpoint: `https://.r2.cloudflarestorage.com`.
* **Region**
* Use `auto` or `APAC` (recommended for R2).
* **Access Key**
* The **Access Key ID** from your R2 API token.
* **Secret Key**
* The **Secret Access Key** from the same token.
* **Path Prefix (optional)**
* Optional folder-like prefix, e.g. `syne/`.
* **Public**
* Keep **off** so objects remain private; manage access through Cloudflare permissions instead.
That's it now, you should be able to dump backup files, uploaded files over to your own buckets.